How-To Start Your Own Blog!
There are so many reasons to start a blog! I started this blog in college as a way to share my recipes and post inspirational quotes. Fast forward FIVE YEARS and look how far we’ve come! I love blogging for so many reasons; it is a great way to share your passion with others & it is a great way to decompress and share your thoughts. For me, I LOVE having all my recipes indexed somewhere easy to find. It is like having my cookbooks indexed online! Not to mention, it makes my recipes accessible to friends and family as well.
If you are thinking about starting a blog, which I have a feeling you are, here is a step-by-step guide to help you get started and become successful! {Note: a lot of my stuff will be related to food blogs specifically, but you can still use this guide to create any type of blog!}
{Disclaimer: Some links are my affiliate links, but they are all from companies that I have used in the past or am currently using, and fully support!}
STEP 1~ Pick A Topic
This may seem simple, but it can actually be very hard! For me, my blog is not only about food. It is also about inspiring people to live a positive life. Yes, I mostly post recipes; but I also post inspirational quotes and try to keep my positive outlook throughout each post. What are you passionate about? If you want people to follow your blog, I would suggest narrowing it down to a specific topic to avoid an identity crisis later on.
STEP 2~ Pick A Name
There are a LOT of websites out there. Do your research and make sure that you are choosing a name that is unique, but easy to remember. Maybe even something catchy? I recommend a name that you can use as the domain name as well. You can check if your domain name is available using this tool:
STEP 3~ Find a Web Host & register your domain
Most web hosting sites will give you free domain names if you use their hosting services. I started my blog with 1and1, but have recently switched to BlueHost.
1and1– 1and1 was the first company I used when starting my blog. They offer awesome introductory rates, which is great if you are not sure whether you will continue the blog thing forever. They have always been able to help via the phone when I have any problems. Their hosting package includes 2 free domain names, which can help you stake your claim; I own savourthesenses.com and savourthesensesblog.com.
Blue Host– I recently switched to BlueHost and am very happy. They have lower rates after your introductory period ends and make it easy to upgrade if you site becomes more popular (which hopefully is the case!). They also allow up to 5 parked domain names for each site, with their Starter package, just incase you really want to stake your claim.

STEP 4~ Install WordPress
WordPress is, without a doubt, the best blog platform- especially if you plan on making money from your blog. First, create Here are instructions on how to install WordPress on 1and1 and BlueHost. Once you have installed WordPress, you can create your blog!
How to Install WordPress on 1and1
How to Install WordPress on BlueHost
Step 5~ Design Your Blog {THIS IS WHERE THE FUN STARTS!}
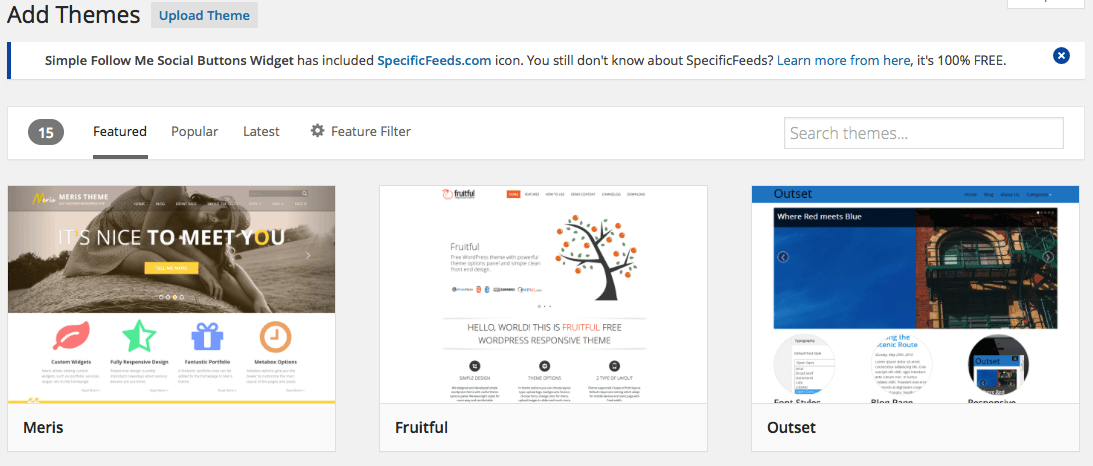
Designing your blog can be overwhelming, but it can also be so much fun! If you have read any other articles on starting your own blog, I am sure they tell you to pay for a theme, pay for the PRO plug-ins, blah, blah, blah. I am here to tell you that you don’t have to pay for any of that. I have created my blog solely with free layouts and free plug-ins. WordPress offers SO many free options; and with a little bit of research on coding, you can tweak your site as needed.
- Pick a theme: I use the Brunelleschi theme on my site. It allows for a lot of customization, which is great! A few others I like are Kouki (very simple, great for photos) and Pacify (great for highlighting each article). If you are serious about you blog and want a professional layout or framework here a a few that many famous bloggers recommend:
- Elegant Themes: This one is a bit more affordable than some of the others and offers a yearly membership or a lifetime membership.
- Thesis Theme: A little more pricy than Elegant Themes, but with more support and features.
- Genesis Framework: If you are serious about this blog thing, this framework if for you. This is great because it is a one-time purchase. You can also get a theme package bundle with the framework for one-time fee. Check out the Daily Dish and Foodie Themes.
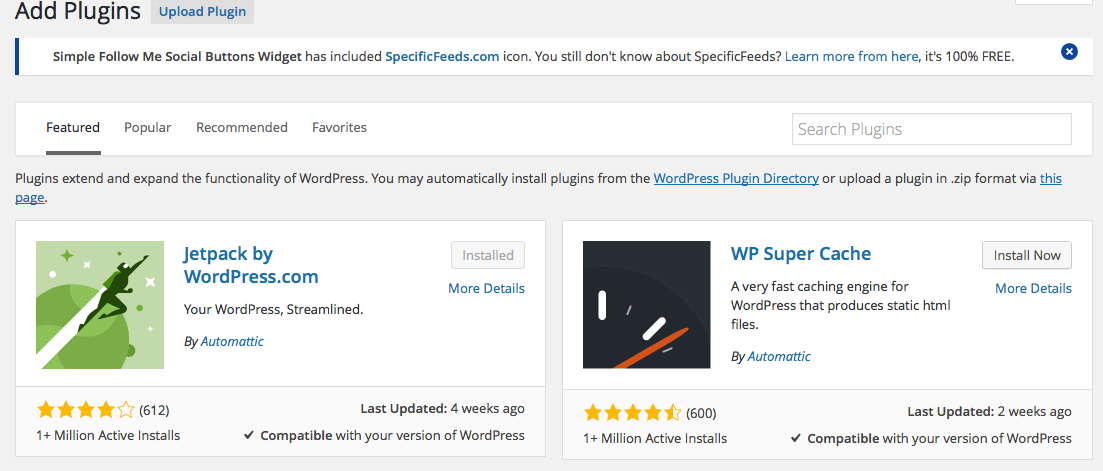
- Add Plug-ins & Widgets: These provide all the bells and whistles for your site. Unless you are a web genius, you will want these to help people interact with your blog and to help with SEO (search engine optimization- AKA how you get noticed). Here are a few of my favorites:
- AJAX Hits Counter + Popular Posts Widget– This allows you to have a sidebar widget that features your most popular posts.
- Askimet– This is a statistics plug-in that helps you monitor your impressions, popular posts, referring sites, etc.
- Bad Behavior– This blocks automated spam-bots from filling your comments with spam. It is the WORST, I highly recommend getting this!
- CP Related Posts– This is a great plug-in to drive viewers to other posts. It inserts suggested posts at the bottom of each post. NOTE: Be sure to assign a featured image for each of your posts, otherwise no photos will show up with your related posts plug-in.
- JetPack by WordPress.com– This plug-in allows you to use some features that are not available on WordPress.org. I use this for sharing options on my posts (i.e- Share to Facebook, Twitter, Pinterest, etc.)
- Print Friendly and PDF– This allows people to print your posts/recipes
- Simple Follow Me Social Buttons Widget– This allows you to put icons, linking to your social media accounts, in the sidebar.
- WP Canvas Widgets– This allows you to create an “About Me’ and social media feeds for your side bar.
- Yummly Rich Recipes– This is a huge one for any food blogger. You NEED to have a recipe plug-in. It automatically encodes all the SEO information you need into you recipes. Yummly, specifically, links to a HUGE recipe website, which will help your recipes get known! I used EasyRecipe in the past, but am extremely happy that Yummly finally created this plug-in.
Step 6~ Start Blogging!
Now you are ready to become a famous blogger! Let me know what your new blog is so I can check it out!
**Tips on Advertising**
If you are interested in monetizing your site, here are a few of my recommendations for Ad Networks:
- BlogHer: If you blog about food, life, parenthood, clothes, etc. BlogHer is a great fit for you.
- Media.net: This is the Ad Network for Bing and Yahoo! contextual ads. They seem to have a higher RPM than other networks that I have worked with and are used on some big name sites like Cosmopolitan, Elle and Forbes. They have a great Dashboard for you to review your statistics as well.
- M by Sovrn: Formerly known as Ligit.com. This is another easy-to-natigate dashboard. They allow a lot of different tools and customizations for ads. Although, I have noticed that their fill rate for ads is not always the best.
Also, grow your social media presence as much as you can. Reach out to brands that you are a fan of; often times they will send you product to review!


Leave a Reply