How to Fabricate a Whole Chicken {Step-by-Step Guide}
Today I have another how-to to share with you all. It is something that used to seem so intimidating to me, but now seems so simple. Not only is it rewarding to be able to break down your own chicken, it is much cheaper than buying pre-cut chicken! I was able to buy whole chickens for less than $5 each at King Soopers! If you want free-range chickens it will be a little more expensive, but still nowhere close to the price of pre-cut pieces. I have also grown to enjoy switching up my typical routine of boneless, skinless breasts. There is so much more to a chicken than that!
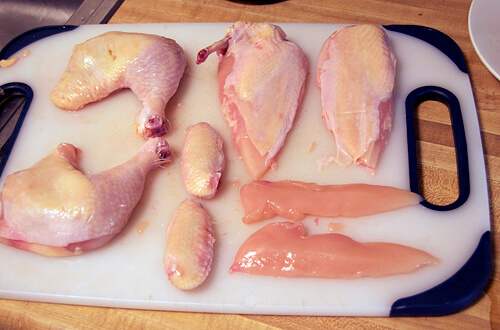 To begin, you will need a large cutting board, two bowls (one for finished pieces and one for scraps), a sharp knife (I like using my Chef’s knife), kitchen shears (optional), and a pairing knife (optional).
First, lay the bird breasts down. Trim away excess fat around the neck. Using shears or a knife, cut directly down each side of the back bone, through the ribs, to remove the spine. Make sure to cut AWAY from yourself.
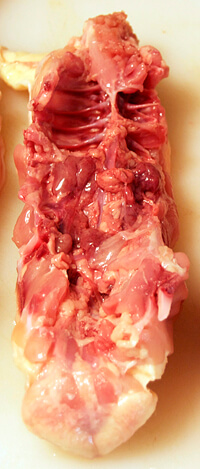 Next, fold open the two sides of the bird. In between the breasts you will see a piece of cartilage/bone called the keel bone. Run your finger down one side of the keel to separate one of the breasts, then cut to separate the two halves.
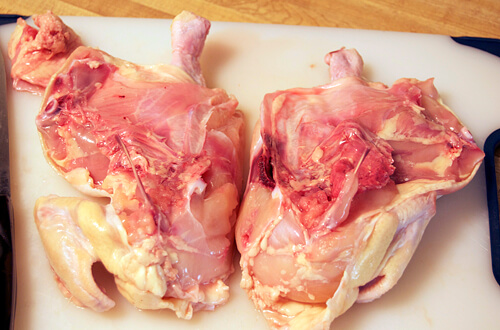 To separate the thighs from the breasts, bend the thigh from the other half to pop the joint. Cut directly through the opening where the joint pops. Repeat for the other thigh.
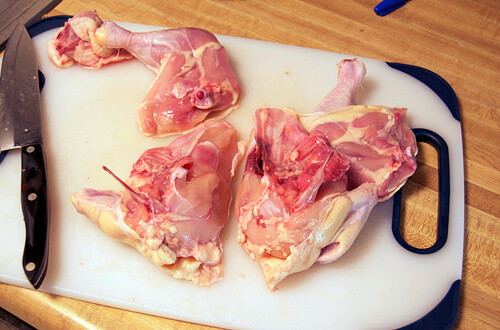
 Now you should have four quarters.
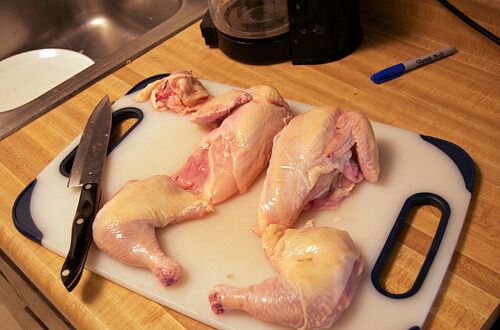 Next you will need to remove the breasts from the remaining bones. A pairing knife works great for this part. Carefully cut the ribs away from the breast in small strokes. Make sure to remove both halves of the wish bone if they are still in the breasts.
 One the breasts are clean, you have a few options. You can keep them as is to serve 4 quartered pieces of chicken. Alternately, you can remove the wing, drummette, or both. To remove the wing, slice the skin at the joint of the wing and drummette, then pop the joint and cut through to remove the wing. This will give you a breast with the drummette and one wing.
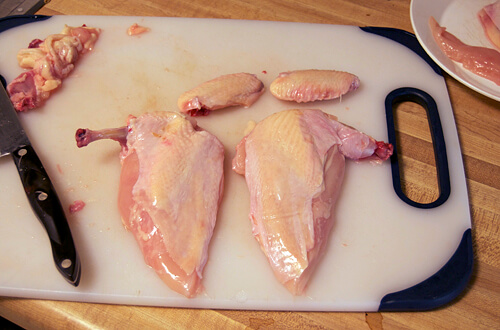 To remove the drummette, cut around the joint connecting the breast to the drummette, pop the joint and cut through. Be sure to trim out any excess cartilage in the breast to make a boneless piece.
 You can also French the bone on the breast for a more dramatic presentation. To do this, cut around the base of the drummette, then scrape the meat towards the end to remove any meat or tendons. If you are Frenching the bone, be sure it is completely free of meat, blood, or tendons before cooking; otherwise it will become burnt while cooking.
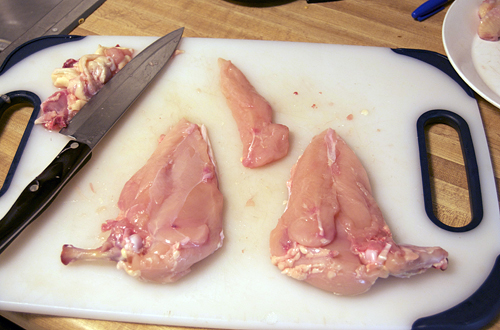 If desired, you can also remove the tenderloins from the breasts to save for another purpose, such as fried chicken tenders or shredded in soup.
 If you have any questions please ask! I know that my description may be a bit confusing without being able to watch each step. Either way, I hope this will help you all fabricate your own chickens. Also, if there is another how-to you would like me to feature, please leave a comment and let me know!
1 Year Ago: Zucchini Pepper-Jack Soup
Related Posts:
5 comments
Leave a Reply
Categories
- Culinary 101 (8)
- Guest Posts (24)
- Quotes (1)
- Recipes (344)
- Appetizers (49)
- Bread (2)
- Breakfast (28)
- Dessert (41)
- Drinks (12)
- Fruit (35)
- Lunch (94)
- Main Course (184)
- Meat (110)
- Salad (12)
- Sauces (70)
- Seafood (57)
- Side Dishes (54)
- Snacks (38)
- Soup (29)
- Vegetables (108)
- Restaurants (18)
- Travel (15)
- Uncategorized (5)
- Updates (12)




It’s so interesting to see how they teach you to do it in culinary school – I do it completely differently, starting with the breast side up. I first pop the thigh joints and remove the thighs, then I cut the breast along the bone at the top, following very closely to the ribs down to remove the breast meat. I usually toss the wings as I don’t care about them. Then I save the carcass for making stock. Next time you’re home we’ll work with two birds and show each other!
I agree with you, Jenny — there’s so much more to chicken than just “boneless, skinless chicken breasts.” This was a neat tutorial — thanks!
Thank your for your thought provoking yet helpful quotes. Could you add a “How to ” for instruction to “deconstruct” a whole chicken with the step by step instructions in print form please. Keep up the good work regards mazzab from downunder.
Yeah I have done it that way too. I feel like I get the most meat from the breasts doing it this way, but I have begun to take the thighs off first then take the back bone out.